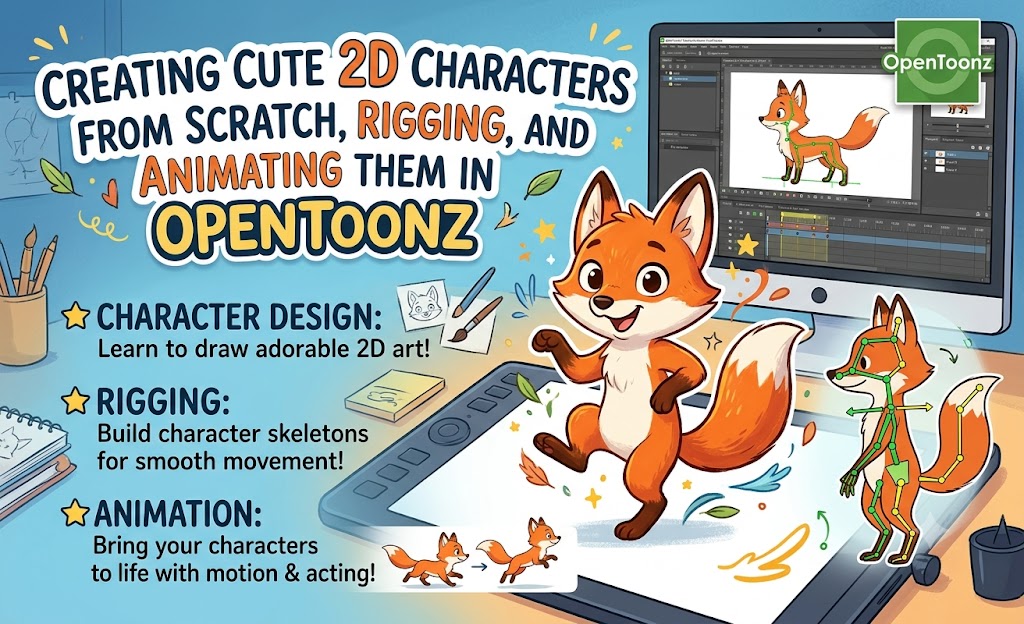
Creating Cute 2D Characters from Scratch, Rigging, and Animating Them in OpenToonz
About Course
Course Content
Module 1 Introduction: Introduction to Cute Character Design and OpenToonz
Welcome to Module 1!
Welcome to the exciting world of 2D character design and animation!
This is the first step in your journey toward creating adorable animated characters that can smile, talk, walk, jump, and tell amazing stories. Whether you dream of making cartoons, animated YouTube videos, educational content, children's animations, social media content, or even game characters, everything begins with understanding the basics.
Many beginners believe animation starts with moving drawings, but professional animators know that great animation begins with great character design and a solid understanding of the animation process. In this module, you will build that strong foundation.
Throughout this module, you will become familiar with OpenToonz, one of the world's most powerful free and open-source 2D animation software packages. Used by independent artists, animation studios, educators, and hobbyists around the world, OpenToonz provides all the tools needed to create professional-quality animations without expensive software.
You will also learn what makes a character look cute, lovable, and memorable. Cute characters are carefully designed using simple shapes, appealing proportions, expressive faces, and engaging personalities. By understanding these design principles early, you will be able to create characters that audiences instantly connect with.
Another important part of this module is learning the 12 Principles of Animation—the timeless techniques developed by master animators that bring drawings to life. These principles help make every movement feel natural, believable, and full of personality. They are used in nearly every professional animation production, regardless of the software being used.
By the end of this module, you will understand how professional 2D animation projects are planned, become comfortable navigating the OpenToonz workspace, recognize the characteristics of successful cute character designs, and prepare your own character concept for the lessons ahead.
Remember, every professional animator once started with a blank canvas. Don't worry if you have never animated before. This course is designed for complete beginners and will guide you step by step. Each new lesson builds upon the previous one, allowing your skills and confidence to grow naturally as you progress.
Take your time, practice each exercise, and don't be afraid to experiment. Animation is both a technical skill and a creative art, and the more you practice, the better your characters will become.
Learning Objectives
By the end of this module, you will be able to:
Understand the complete 2D animation production pipeline.
Explain the role of character design in successful animation projects.
Install and configure OpenToonz for animation work.
Navigate the OpenToonz interface with confidence.
Identify and apply the 12 Principles of Animation.
Recognize the design elements that make characters cute and appealing.
Develop a simple character concept using reference images and mood boards.
Prepare for drawing and animating your first original character in the next module.
Lessons in This Module
Lesson 1: Introduction to 2D Character Animation
Lesson 2: Installing and Exploring OpenToonz
Lesson 3: Understanding the Principles of Animation
Lesson 4: Understanding Cute Character Styles
Lesson 5: Planning Your Character
What You'll Need
To get the most out of this course, have the following ready before you begin:
A computer running Windows, macOS, or Linux.
The latest version of OpenToonz installed.
A mouse or, preferably, a graphics tablet.
A sketchbook and pencil (optional but recommended).
A folder for organizing your course files and projects.
Enthusiasm, creativity, and a willingness to practice.
End of Module Preview
This module lays the groundwork for everything that follows. Once you've completed it, you'll be ready to start drawing your own cute characters from scratch in Module 2, where your ideas will begin taking shape and your animation journey will truly come to life.
Let's get started and bring your imagination to life—one drawing, one frame, and one animation at a time!
-
Lesson 1: Introduction to 2D Character Animation
-
Lesson Review Questions
-
Lesson 2: Installing and Exploring OpenToonz
-
Lesson Review Questions
-
Lesson 3: Understanding the 12 Principles of Animation
-
Review Questions
-
Lesson 4: Understanding Cute Character Styles
-
Review Questions
-
Lesson 5: Planning Your Character
-
Review Questions
Module 2: Drawing Cute Characters from Scratch
Module Introduction
Welcome to Module 2!
Now that you have completed Module 1, you have a solid understanding of the animation process, the OpenToonz interface, the 12 Principles of Animation, and the fundamentals of cute character design. You've also planned your very first original character.
In this module, you'll begin bringing your ideas to life by learning how to draw cute 2D characters from scratch.
Every memorable animated character starts with simple shapes. Professional character artists don't begin by drawing tiny details—they first create a strong foundation using circles, ovals, rectangles, and other basic shapes. Once the structure is in place, they gradually add facial features, hairstyles, clothing, accessories, and expressions.
Throughout this module, you'll discover how to build characters step by step, making the process simple, enjoyable, and easy to follow—even if you've never drawn before.
You'll learn how to create balanced body proportions, expressive faces, appealing hairstyles, simple clothing, and professional turnaround sheets. By the end of the module, you'll have a complete character design ready to be prepared for rigging and animation in later modules.
Remember, every great animator was once a beginner. Don't worry about making perfect drawings. Focus on understanding the construction process, practicing consistently, and improving with each sketch. Every drawing you create will strengthen your skills and confidence.
Take your time with each lesson, complete the exercises, and don't be afraid to experiment with different ideas. Character design is a creative journey, and there is no single "correct" way to create a cute character.
Learning Objectives
By the end of this module, you will be able to:
Use simple geometric shapes to construct cute characters.
Draw balanced heads, faces, and facial features.
Create appealing body proportions for cute characters.
Design hairstyles, clothing, and accessories.
Draw expressive hands and feet.
Create consistent front, side, and back views of a character.
Produce a professional character turnaround sheet ready for animation.
Lessons in This Module
Lesson 1: Basic Shapes and Character Construction
Learn how to use circles, ovals, rectangles, and other simple shapes as the foundation of every character.
Lesson 2: Drawing Cute Heads and Faces
Discover how to create adorable heads, expressive eyes, noses, mouths, ears, and facial expressions.
Lesson 3: Drawing Cute Bodies
Learn proper body proportions and how to draw the torso, arms, legs, hands, and feet.
Lesson 4: Designing Hairstyles and Clothing
Create hairstyles, outfits, shoes, and accessories that match your character's personality while remaining easy to animate.
Lesson 5: Creating Professional Character Turnarounds
Draw your character from the front, side, back, and three-quarter views to prepare it for rigging and animation.
Tools You'll Need
Before starting this module, make sure you have:
OpenToonz installed and working.
A graphics tablet (recommended) or a mouse.
A sketchbook and pencil (optional).
Your character planning sheet from Module 1.
A folder for saving your drawings and project files.
Tips for Success
To get the most from this module:
Start every drawing with simple shapes.
Draw lightly when sketching so corrections are easy.
Practice each lesson several times before moving on.
Keep your designs simple and clean.
Focus on construction before adding details.
Compare your new drawings with earlier ones to track your improvement.
Don't be discouraged by mistakes—they are a natural part of learning.
What You'll Create
By the end of Module 2, you will have:
A fully sketched cute character.
A clean character design with expressive facial features.
A complete body design with correct proportions.
Original clothing and hairstyle designs.
A polished character turnaround sheet showing multiple views.
A character that is ready to be prepared for rigging and animation in the next module.
End of Module Preview
In the lessons ahead, you'll move from simple sketches to a complete character design. Every line you draw will bring your character one step closer to becoming a fully animated personality.
Let's begin with Lesson 1: Basic Shapes and Character Construction, where you'll discover how professional artists use simple shapes to create amazing characters from scratch.
-
Lesson 1: Basic Shapes and Character Construction
-
Review Questions
-
Lesson 2: Drawing Cute Heads and Faces
-
Review Questions
-
Lesson 3: Drawing Cute Bodies
-
Review Questions
-
Lesson 4: Designing Hairstyles and Clothing
-
Review Questions
-
Lesson 5: Creating Professional Character Turnarounds
-
Review Questions
MODULE 3: Preparing Artwork for Animation
Welcome to Module 3!
Congratulations on completing Module 2! You have successfully designed your own cute 2D character from scratch. Your character now has a unique personality, expressive facial features, a complete body, clothing, accessories, and a professional turnaround sheet.
Before you can rig and animate your character in OpenToonz, there is one very important stage you must complete—preparing your artwork for animation.
Many beginners are eager to start animating immediately, but professional animators know that the quality of an animation depends heavily on how well the artwork is prepared. Clean, organized artwork makes the rigging process faster, easier, and produces smoother, more professional-looking animations.
Imagine trying to build a puzzle with pieces that don't fit together. That's what animating poorly prepared artwork feels like. Lines may overlap, colors may spill into the wrong areas, body parts may not move correctly, and editing becomes frustrating.
In this module, you'll learn how to transform your rough character drawings into clean, animation-ready artwork. You'll discover how to clean up sketches, create smooth line art, apply beautiful colors, separate body parts for animation, organize your layers professionally, and import your artwork into OpenToonz with the correct settings.
These skills are used by professional animation studios because they help maintain consistency throughout an entire project and make collaboration much easier.
By the end of this module, your character will be fully prepared for the next exciting stage—building a character rig in OpenToonz.
Why Artwork Preparation Is Important
Preparing artwork before animation helps you:
Produce clean, professional-looking drawings.
Keep your character consistent throughout the project.
Make rigging easier and more accurate.
Reduce animation errors.
Organize your files for faster editing.
Save time during production.
Good preparation leads to better animation results.
Learning Objectives
By the end of this module, you will be able to:
Clean rough sketches into polished line art.
Apply flat colors, shadows, and highlights.
Create harmonious color palettes.
Separate your character into individual body parts for rigging.
Organize layers using professional naming conventions.
Structure project folders efficiently.
Import artwork correctly into OpenToonz.
Configure a new animation scene with the proper resolution and frame rate.
Software and Materials Needed
For this module, you will need:
OpenToonz installed on your computer.
Your completed character artwork from Module 2.
A graphics tablet (recommended) or a mouse.
A project folder for storing artwork and animation files.
A backup location such as cloud storage or an external drive.
Tips for Success
As you work through this module, remember to:
Zoom in while cleaning your line art.
Keep your line thickness consistent.
Save your work regularly.
Name every layer clearly.
Organize your files into folders.
Keep backup copies of your project.
Take your time—clean preparation leads to better animation.
What You'll Create
By the end of Module 3, you will have:
Clean, polished line art.
A fully colored character.
Properly separated body parts.
Well-organized project layers.
Professionally named files.
An OpenToonz project with your artwork correctly imported and ready for rigging.
End of Module Preview
Once your artwork has been cleaned, colored, organized, and imported into OpenToonz, you'll be ready for one of the most exciting parts of the animation process.
In Module 4: Building a Rig in OpenToonz, you'll learn how to connect your character's body parts, set pivot points, build a reusable rig, and prepare your character for smooth, professional animation.
Let's begin with Lesson 1: Clean Line Art, where you'll learn how to transform rough sketches into polished artwork suitable for professional animation.
-
Lesson 1: Clean Line Art
-
Multiple Choice Questions
-
Lesson 2: Coloring Characters
-
Lesson 2 questions
-
Lesson 3: Separating Character Parts
-
Review Questions
-
Lesson 4: Naming and Organizing Layers
-
Lesson 4
-
Lesson 5: Importing Artwork into OpenToonz
-
Review Questions
Module 4: Building a Rig in OpenToonz
-
Lesson 1: Understanding Character Rigging
-
Multiple Choice Questions
-
Lesson 2: Setting Pivot Points
-
Review Questions
-
Lesson 3: Connecting Character Parts
-
Review Questions
-
Lesson 4: Testing Character Movement
-
Review Questions
-
Lesson 5: Creating Reusable Character Rigs
-
Review Questions
Module 5: Facial Animation and Lip Sync
Module Introduction
Welcome to Module 5!
Congratulations on completing Module 4. Your character now has a fully functional rig and is ready to move. It can turn its head, wave its hands, bend its arms and legs, and perform many different actions.
But movement alone is not enough to make a character feel alive.
Think about your favorite animated characters. What makes them memorable isn't just how they move—it's how they smile, laugh, cry, become angry, show fear, or speak. Their facial expressions help the audience understand their emotions, while lip synchronization makes their dialogue believable.
Facial animation is one of the most powerful storytelling tools in animation. A simple smile can show happiness. Raised eyebrows can express surprise. Narrowed eyes and a frown can communicate anger or determination. Even without dialogue, a character's face can tell an entire story.
In this module, you'll learn how to give your character personality through facial expressions, eye movements, mouth shapes, and synchronized speech. You'll discover how professional animators use subtle facial movements to create convincing performances that connect emotionally with the audience.
By the end of this module, your character will not only move—it will communicate, express emotions, and speak naturally.
Why Facial Animation Is Important
Facial animation helps your audience:
Understand your character's emotions.
-
Lesson 1: Drawing Facial Expressions
-
Review Questions
-
Lesson 2: Eye Animation
-
Review Questions
-
Lesson 3: Mouth Shapes
-
Review Question
-
Lesson 4: Lip Sync Animation
-
Review Questions
-
Lesson 5: Combining Facial Expressions
-
Review Questions
Module 6: Animating Character Movement
Module Introduction
Welcome to Module 6!
Congratulations on completing Module 5. Your character can now express emotions, blink naturally, speak with synchronized lip movements, and communicate through facial acting.
Now it's time to make your character truly come alive through movement.
Movement is one of the most exciting aspects of animation. Whether a character is standing still, walking, running, jumping, or simply breathing, every movement tells a story. Good animation is not just about moving objects—it is about creating believable actions that make viewers connect with your characters.
Professional animators understand that even when a character is not performing a major action, it should never look completely frozen. Small movements such as breathing, blinking, shifting weight, or gently swaying help create the illusion of life. These are called idle animations.
In this module, you'll learn the fundamental principles of character movement using OpenToonz. You'll discover how to create keyframes, animate smooth idle motions, build realistic walk cycles, create energetic running animations, and produce convincing jumps and landings.
Each lesson builds upon the previous one, so by the end of the module, you'll have the skills needed to animate a wide variety of character actions.
Why Character Movement Matters
Movement is one of the primary ways a character communicates with an audience.
Well-animated movement helps to:
Show personality.
Express emotions.
Tell a story.
Capture the viewer's attention.
Make characters feel alive.
Create believable actions.
Even a simple walk can reveal whether a character is happy, tired, nervous, confident, or excited.
Learning Objectives
By the end of this module, you will be able to:
Understand and use keyframes effectively.
Create smooth idle animations.
Build professional walk cycles.
Animate realistic running sequences.
Create convincing jumps and landings.
Apply proper animation timing to character movement.
Lessons in This Module
Lesson 1: Keyframes
In this lesson, you'll learn:
What keyframes are.
How keyframes control animation.
Creating and editing keyframes.
Understanding animation timing.
Building smooth motion between keyframes.
Keyframes are the foundation of nearly every animation you'll create.
Lesson 2: Idle Animations
A living character is never completely still.
You'll learn how to animate:
Natural breathing.
Eye blinking.
Small body movements.
Gentle weight shifting.
These subtle movements make your characters appear alive, even when standing still.
Lesson 3: Walk Cycles
Walking is one of the most common character animations.
You'll learn how to create a complete walk cycle using the four essential poses:
Contact Pose
Down Pose
Passing Pose
Up Pose
You'll also learn how to loop the animation smoothly for continuous walking.
Lesson 4: Running Cycles
Running follows many of the same principles as walking but uses faster timing and more dynamic body movement.
You'll learn:
Proper body leaning.
Faster leg movement.
Strong arm swings.
Dynamic running poses.
These techniques create energetic and believable running animations.
Lesson 5: Jumping and Landing
Every convincing jump follows a sequence of actions.
You'll learn:
Anticipation.
Takeoff.
Airborne movement.
Landing.
Recovery after landing.
Understanding these stages will help you animate realistic jumps with proper timing and weight.
Software and Materials Needed
To complete this module, you will need:
OpenToonz.
Your completed character rig.
Your facial expression library.
Your mouth shape library.
A mouse or graphics tablet.
Plenty of practice and patience.
Tips for Success
As you work through this module:
Observe how people move in real life.
Study animated movies frame by frame.
Start with slow, simple movements before attempting fast actions.
Preview your animation frequently.
Make small adjustments rather than large changes.
Focus on smooth timing and natural movement.
Remember, believable animation is created through careful observation and repeated practice.
What You'll Create
By the end of this module, you will have:
Smooth keyframe animations.
Natural idle movements.
A complete looping walk cycle.
A dynamic running cycle.
A realistic jump and landing animation.
These skills form the foundation of professional 2D character animation.
End of Module Preview
After learning how to animate movement, you'll be ready to focus on performance.
In Module 7: Character Acting, you'll discover how to use body language, timing, gestures, and emotional movement to transform simple animations into memorable performances that tell compelling stories.
Get ready to take your character animation skills to the next level!
-
Lesson 1: Keyframes
-
Review Question
-
Lesson 2: Idle Animations
-
Review Questions
-
Lesson 3: Walk Cycles
-
Review Questions
-
Lesson 4: Running Cycles
-
Review Question
-
Lesson 5: Jumping and Landing
-
Review Questions
Module 7: Character Acting
Module Introduction
Welcome to Module 7: Character Acting!
Congratulations on completing Module 6. Your character can now stand naturally, breathe, blink, walk, run, jump, and land smoothly. These movement skills are the foundation of animation.
However, animation is much more than movement.
Imagine two characters walking across a room. They perform the exact same action, but one walks slowly with slumped shoulders and lowered eyes, while the other walks confidently with an upright posture and a smile. Although both characters are walking, they communicate completely different emotions and personalities.
This is where character acting comes in.
Character acting is the art of making an animated character think, feel, and behave like a real person. Through body language, timing, facial expressions, gestures, and movement, you can show happiness, sadness, fear, excitement, confidence, nervousness, and many other emotions without relying entirely on dialogue.
Professional animators spend a great deal of time studying human behavior because believable acting is what transforms a simple animation into a memorable performance.
In this module, you'll learn how to use posture, timing, gestures, emotions, and body movement to give your characters personality and make them truly come alive.
Why Character Acting Is Important
Character acting helps your audience:
Understand a character's emotions.
Recognize different personalities.
-
Lesson 1: Body Language
-
Review Questions
-
Lesson 2: Acting with Timing
-
Review Questions
-
Lesson 3: Emotional Animation
-
Review Question
-
Lesson 4: Gesture Animation
-
Review Questions
-
Lesson 5: Character Performance
-
Review Questions
Module 8: Scene Creation and Camera Animation
Module Introduction
Welcome to Module 8: Scene Creation and Camera Animation!
Congratulations on completing Module 7: Character Acting. Your characters can now move, express emotions, use gestures, and perform believable actions. You have learned how to make your characters feel alive.
However, a great animation needs more than just a well-designed character. Characters need a world to exist in. They need environments, backgrounds, camera movements, lighting, and visual effects that help tell the story.
This is where scene creation and camera animation become important.
A scene is the complete environment where your animation takes place. It includes the background, characters, props, lighting, and camera position. The camera determines what the audience sees and how they experience the story.
Think about a movie scene. A close-up shot can show a character's emotions. A wide shot can show the entire environment. A moving camera can create excitement and guide the viewer's attention.
Professional animators use camera techniques and scene design to create cinematic experiences that make animations more engaging.
In this module, you will learn how to create backgrounds, arrange scenes, control cameras, manage multiple characters, add lighting effects, and polish your final animation.
Why Scene Creation and Camera Animation Matter
A character animation becomes much more powerful when placed in the right environment.
Good scene creation helps:
Establish the story location.
Create mood and atmosphere.
Guide the audience's attention.
Make characters feel connected to their world.
Improve the professional quality of the animation.
Good camera animation helps:
Create cinematic storytelling.
Highlight important moments.
Add excitement and emotion.
Control what the audience sees.
Learning Objectives
By the end of this module, you will be able to:
Create simple animated environments.
Design backgrounds that support your characters.
Use OpenToonz camera controls.
Create zoom, pan, and rotation movements.
Animate scenes with multiple characters.
Add lighting effects and atmosphere.
Polish scenes for professional presentation.
-
Lesson 1: Creating Backgrounds
-
Review Questions
-
Lesson 2: Camera Controls
-
Review Questions
-
Lesson 3: Multi-Character Scenes
-
Review Questions
-
Lesson 4: Lighting and Effects
-
Review Questions
-
Lesson 5: Scene Polish
-
Review Questions
Module 9: Advanced Animation Techniques
Module Introduction
Welcome to Module 9: Advanced Animation Techniques!
Congratulations on completing Module 8: Scene Creation and Camera Animation. You have learned how to create backgrounds, animate cameras, manage multi-character scenes, apply lighting effects, and polish your animations. Your projects are now looking much more complete and professional.
Now it's time to take your animation skills to the next level.
Professional-quality animation is often defined by the small details that many beginners overlook. Elements such as flowing hair, moving clothing, dynamic camera shots, realistic motion, and an organized production workflow can transform a good animation into an outstanding one.
In this module, you will explore advanced techniques used by professional animators to create polished, cinematic, and visually engaging animations. These techniques improve realism, enhance storytelling, and make your projects look more dynamic.
You will learn how to create natural secondary motion, add exciting special effects, animate dynamic camera movements, refine motion using animation curves and interpolation, and develop an efficient workflow for handling complex animation projects.
Although these techniques are considered advanced, they are presented in a simple, step-by-step manner so that even beginners can understand and apply them.
Why Advanced Techniques Matter
Advanced animation techniques help you:
Create smoother and more natural movement.
Make characters feel more alive.
Improve the visual quality of your animations.
Produce cinematic scenes.
Work faster and more efficiently.
Build animations that meet professional standards.
These skills are commonly used in animated films, television shows, online videos, advertisements, and game cutscenes.
Learning Objectives
By the end of this module, you will be able to:
Create believable secondary motion.
Add professional-looking special effects.
Animate dynamic camera movements.
Improve motion using animation curves and interpolation.
Organize animation projects using a professional workflow.
Lessons in This Module
Lesson 1: Secondary Motion
Learn how to animate movements that naturally follow the main action.
Topics include:
Hair movement.
Clothing movement.
Accessories.
Follow-through.
Overlapping action.
These details make animations feel more realistic.
Lesson 2: Special Effects
Discover how to create exciting visual effects that enhance your scenes.
Topics include:
Dust.
Smoke.
Sparkles.
Speed lines.
Simple environmental effects.
These effects add energy and visual appeal to your animations.
Lesson 3: Dynamic Camera Animation
Take your camera work beyond simple pans and zooms.
Topics include:
Tracking shots.
Cinematic camera movement.
Camera shake.
Action-focused camera techniques.
These methods create more dramatic and engaging scenes.
Lesson 4: Animation Curves and Interpolation
Learn how to make movements smoother and more natural.
Topics include:
Ease In.
Ease Out.
Motion refinement.
Interpolation.
Smoother transitions.
These techniques help eliminate stiff or mechanical movement.
Lesson 5: Professional Workflow
Learn how professional animators organize large projects.
Topics include:
Scene organization.
Reusable assets.
Version control.
Backup strategies.
Efficient project management.
A good workflow saves time and reduces mistakes.
Software and Materials Needed
For this module, you will need:
OpenToonz.
Your completed character rigs.
Background scenes.
Previous animation exercises.
Sound effects (optional).
Practice project files.
Tips for Success
As you progress through this module:
Observe real-life movement carefully.
Practice small details such as hair and clothing motion.
Use special effects only when they support the story.
Keep camera movements smooth and meaningful.
Stay organized by naming files and layers clearly.
Save backup copies of your work regularly.
Remember, professional animation is often the result of careful planning and attention to detail.
What You'll Create
By the end of this module, you will have:
Characters with natural secondary motion.
Dynamic camera sequences.
Scenes enhanced with special effects.
Smooth and polished character movements.
A professional project organization system.
These skills will significantly improve the quality of your animations and prepare you for producing more complex projects.
End of Module Preview
After completing this module, you will move on to the final part of the course—Module 10: Final Animation Project and Exporting.
There, you will plan, produce, render, export, and publish a complete animation project while building a professional portfolio that showcases everything you have learned throughout this course.
By the end of Module 10, you will have completed your first fully animated project from concept to final export, ready to share with clients, employers, or your online audience.
-
Lesson 1: Secondary Motion
-
Review Questions
-
Lesson 2: Special Effects
-
Review Questions
-
Lesson 3: Dynamic Camera Animation
-
Review Questions
-
Lesson 4: Animation Curves and Interpolation
-
Review Questions
-
Lesson 5: Professional Workflow
-
Review Questions
Module 10: Final Animation Project and Exporting
Module Introduction
Congratulations! You have reached the final module of this course.
Over the previous nine modules, you have learned every major step involved in creating a complete 2D animated character using OpenToonz. You started by learning the fundamentals of animation, designed your own cute 2D characters from scratch, prepared them for rigging, built character rigs, created facial expressions and lip sync, animated realistic movements, designed complete scenes, mastered camera controls, added special effects, and learned professional production techniques.
Now it is time to bring all of those skills together into one complete animation project.
In this final module, you will plan, produce, polish, render, export, and publish a fully animated short project from beginning to end. This module follows the same workflow used by professional animation studios, allowing you to experience the complete production pipeline.
By the end of this module, you will have created a finished animation that showcases everything you have learned throughout this course. This final project can become the first piece in your professional animation portfolio and can be shared on YouTube, social media platforms, personal websites, or submitted to potential clients and employers.
Why This Module Is Important
Many beginners spend months learning animation but never complete a full project.
Creating a complete animation teaches you how to:
Plan an animation from start to finish.
Solve production challenges.
Manage time effectively.
Combine multiple animation techniques.
Build confidence as an animator.
Create portfolio-quality work.
Finishing projects is one of the most valuable habits you can develop as an animator.
Learning Objectives
By the end of this module, you will be able to:
Plan a complete animation project.
Create storyboards and shot lists.
Produce and assemble animation scenes.
Add dialogue, music, and sound effects.
Render and export high-quality animations.
Build a professional animation portfolio.
Prepare animations for publishing online.
Lessons in This Module
Lesson 1: Planning the Final Project
Learn how to organize your animation before production begins.
Topics include:
Developing a story idea.
Creating a storyboard.
Preparing a shot list.
Building an asset checklist.
Planning production.
Good planning reduces mistakes and speeds up production.
Lesson 2: Producing the Animation
Bring your project to life.
Topics include:
Building scenes.
Animating characters.
Combining backgrounds.
Organizing scenes.
Reviewing progress.
You will apply nearly every skill learned throughout the course.
Lesson 3: Adding Audio
Discover how sound improves animation.
Topics include:
Dialogue.
Background music.
Sound effects.
Audio synchronization.
Final audio adjustments.
Good sound makes animation more immersive.
Lesson 4: Rendering and Exporting
Prepare your animation for sharing.
Topics include:
Render settings.
Video formats.
Image sequences.
Resolution.
Quality optimization.
You will learn how to produce high-quality final videos suitable for different platforms.
Lesson 5: Publishing and Portfolio Development
Learn how to present your work professionally.
Topics include:
Creating a demo reel.
Exporting for YouTube.
Preparing animations for social media.
Organizing your portfolio.
Planning your next animation projects.
A strong portfolio is essential for attracting clients, employers, and collaborators.
Software and Resources Needed
For this module, you will use:
OpenToonz.
Your completed character rigs.
Background artwork.
Props and reusable assets.
Audio files (music, dialogue, and sound effects).
Storyboards.
Previous animation scenes.
Tips for Success
As you complete your final project:
Plan before animating.
Keep your files organized.
Save your work regularly.
Review each scene before moving on.
Accept feedback and make improvements.
Focus on completing the project rather than making every detail perfect.
Remember that a finished project teaches you more than an unfinished one.
Final Project Overview
Your final project should include:
At least one original cute 2D character.
A complete background.
Character rigging.
Facial expressions.
Lip sync (if dialogue is included).
Camera movement.
Multiple animation scenes.
Special effects.
Background music.
Sound effects.
A polished final render.
The project should demonstrate the techniques covered throughout this course.
What You Will Achieve
By completing this module, you will have:
Designed an original animated character.
Produced a complete short animation.
Learned a professional production workflow.
Exported a finished video.
Built your first animation portfolio project.
Gained the confidence to create future animation projects independently.
Preparing for Your Animation Career
Completing this course is only the beginning.
Continue improving by:
Animating regularly.
Studying professional films and cartoons.
Experimenting with different animation styles.
Building new characters.
Expanding your portfolio.
Sharing your work online.
Accepting constructive feedback.
Learning from every new project.
The more animations you complete, the faster your skills will grow.
Final Encouragement
Animation is a skill that improves with consistent practice.
Every professional animator once created their very first animation.
Do not worry if your first project is not perfect. Focus on finishing it, learning from the experience, and applying those lessons to your next project.
Each animation you create will be better than the last.
Keep practicing, stay creative, and enjoy the journey of bringing your ideas to life.
Congratulations on reaching the final module of Creating Cute 2D Characters from Scratch, Rigging and Animating Them in OpenToonz Step by Step.
Your journey from beginner to confident 2D animator is now complete—and your next great animation is waiting to be created.
-
Lesson 1: Planning the Final Project
-
Review Questions
-
Lesson 2: Producing the Animation
-
Review Questions
-
Lesson 3: Adding Audio
-
Review Questions
-
Lesson 4: Rendering and Exporting
-
True or False
-
Lesson 5: Publishing and Portfolio Development
-
Review Questions
Student Ratings & Reviews

No Review Yet