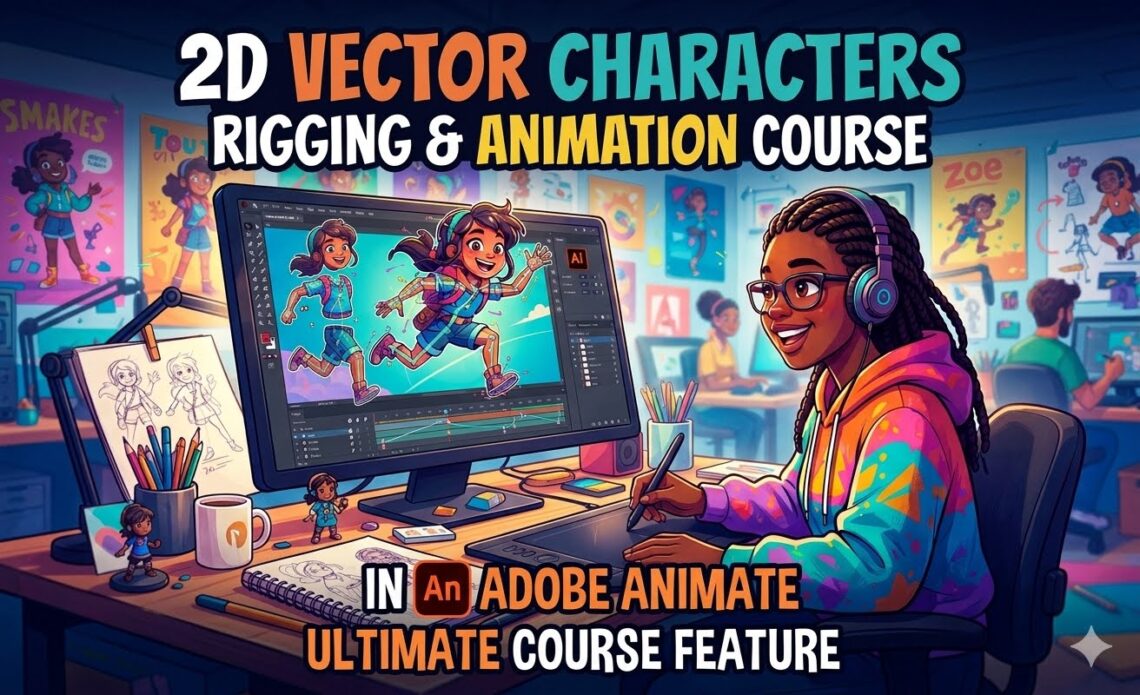
Creating 2D Vector Characters, Rigging, and Animating Them in Adobe Animate
About Course
Course Content
MODULE 1: Introduction to 2D Vector Character Design and Animation
Module Overview
Welcome to Module 1: Introduction to 2D Vector Character Design and Animation.
Before creating amazing animated characters, it is important to understand the foundation behind professional character animation. Animation is not just about moving drawings on a screen; it is about bringing ideas, emotions, and stories to life through carefully designed characters and movements.
In this module, you will be introduced to the world of 2D vector character creation and animation. You will learn how professional animators develop characters, why vector graphics are widely used in modern animation, and how tools like Adobe Illustrator and Adobe Animate work together to create complete animated projects.
Think of this module as building the foundation of a house. Before constructing a beautiful building, you need a strong foundation. In the same way, before creating and animating characters, you need to understand the principles, tools, and workflow used by professional animators.
By the end of this module, you will understand:
What 2D character animation is and how it works
The difference between vector and raster graphics
Why vector characters are suitable for animation
The role of Adobe Illustrator and Adobe Animate
The complete character creation workflow
The basic principles that make animations look professional
What You Will Learn in This Module
Lesson 1: Understanding 2D Character Animation
In this lesson, you will discover what 2D animation means and how animated characters are created.
You will learn:
The history and development of 2D animation
How traditional animation differs from digital animation
How modern animators create characters for films, games, advertisements, and online content
The different career opportunities available in character animation
You will understand that every animated character starts with an idea, which is transformed into a design, prepared for movement, and finally animated.
Lesson 2: Understanding Vector Graphics
This lesson introduces the foundation of vector character design.
You will learn:
What vector graphics are
How vectors are created using mathematical paths
The difference between vector and raster images
Why professional animators prefer vector artwork
How vector characters can be resized without losing quality
This knowledge will help you create characters that remain sharp and professional whether they appear on a small mobile screen or a large movie display.
Lesson 3: Introduction to Adobe Illustrator and Adobe Animate
In this lesson, you will become familiar with the two main tools used throughout this course.
You will learn:
Adobe Illustrator:
Creating vector drawings
Using drawing tools
Creating character parts
Organizing artwork
Adobe Animate:
Importing character designs
Creating movement
Using timelines
Building animations
You will understand how these two programs work together in a professional animation workflow.
Lesson 4: The Character Creation Workflow
Creating an animated character involves several important stages.
In this lesson, you will learn the complete process:
Stage 1: Concept Development
Creating the idea behind the character.
Stage 2: Character Design
Drawing the character's appearance, personality, clothing, and features.
Stage 3: Vector Creation
Turning the design into clean digital artwork.
Stage 4: Rig Preparation
Separating body parts so they can move.
Stage 5: Rigging
Adding controls and structure for animation.
Stage 6: Animation
Bringing the character to life through movement.
Understanding this workflow will help you approach every animation project professionally.
Lesson 5: Animation Principles Every Character Designer Should Know
Great animation is not only about moving objects. It is about creating movement that feels natural and believable.
In this lesson, you will learn important animation principles such as:
Squash and Stretch
Anticipation
Staging
Timing and Spacing
Slow In and Slow Out
Follow Through
Overlapping Action
Appeal
These principles are used by professional animators around the world to create characters that feel alive.
Module Project
At the end of this module, you will complete a simple planning exercise:
Create Your First Character Animation Plan
You will:
Choose a character idea.
Define the character's personality.
Decide the purpose of the character.
Create a basic character description.
Plan how the character will eventually move and act.
This exercise prepares you for the character design process in later modules.
Module Learning Outcome
After completing this module, you should be able to:
✅ Explain the basics of 2D character animation
✅ Understand how vector graphics work
✅ Identify the tools used for character creation and animation
✅ Describe the professional animation workflow
✅ Apply basic animation principles when designing characters
In the next lessons, we will begin exploring the exciting world of creating characters and transforming simple ideas into animated personalities.
-
LESSON 1: UNDERSTANDING 2D CHARACTER ANIMATION
-
Review Questions
-
LESSON 2: UNDERSTANDING VECTOR GRAPHICS
-
Review Questions
-
Lesson 3: Introduction to Adobe Illustrator and Adobe Animate
-
Review Questions
-
LESSON 4: THE CHARACTER CREATION WORKFLOW
-
Review Questions
-
LESSON 5: ANIMATION PRINCIPLES EVERY CHARACTER DESIGNER SHOULD KNOW
-
Review Questions
MODULE 2: Character Concept Development and Design
Module Introduction
Welcome to Module 2: Character Concept Development and Design.
In Module 1, you learned the fundamentals of 2D animation, vector graphics, the Adobe Illustrator and Adobe Animate workspaces, the character creation workflow, and the basic principles of animation. You now have a solid understanding of how professional animators approach their work.
In this module, you will begin one of the most exciting stages of the animation process—designing your own original character.
A great animation starts with a great character. Before a character can be rigged or animated, it must first be carefully planned and designed. Professional character designers spend time thinking about a character's personality, appearance, clothing, expressions, and body language before drawing the final artwork.
Imagine watching a cartoon where every character looks exactly the same, dresses the same, and behaves the same. It would quickly become boring. Great characters are unique. They have their own personalities, strengths, weaknesses, emotions, and visual styles that make them memorable.
Throughout this module, you will learn how to turn simple ideas into interesting characters that are suitable for animation. You will discover how professional artists use shapes, proportions, facial expressions, colors, and poses to communicate a character's personality before the character even speaks.
By the end of this module, you will have designed a complete character concept that is ready to be turned into professional vector artwork in the next module.
Why Character Design Matters
Character design is much more than drawing a person or an animal.
A well-designed character:
Tells a story.
Expresses emotions.
Reflects a unique personality.
Is easy to recognize.
Is suitable for animation.
Connects with the audience.
Every successful animated character begins with thoughtful planning and creative design.
What You Will Learn in This Module
Lesson 1: Creating Character Ideas and Stories
In this lesson, you will learn how to develop original character ideas from simple concepts. You will discover where to find inspiration, how to build a character's personality, create a backstory, define goals and motivations, and understand your target audience.
By the end of the lesson, you will be able to create a strong character concept that serves as the foundation for your entire animation project.
Lesson 2: Character Shape Language
Every shape communicates a different feeling.
In this lesson, you will learn how professional designers use circles, squares, triangles, and other geometric shapes to influence how audiences perceive a character.
You will learn how to design:
Friendly characters
Strong heroes
Funny characters
Villains
Wise mentors
Cute cartoon characters
You will also learn how combining different shapes creates unique personalities.
Lesson 3: Character Anatomy and Proportions
A well-balanced character is easier to animate and more believable.
In this lesson, you will study:
Basic human anatomy
Cartoon anatomy
Head-to-body proportions
Male and female body structures
Children's proportions
Stylized and exaggerated characters
You will also learn how different proportions affect a character's appearance and personality.
Lesson 4: Creating Facial Features and Expressions
The face is one of the most expressive parts of any character.
In this lesson, you will learn how to design:
Eyes
Eyebrows
Noses
Mouths
Ears
Hair
You will also create a variety of facial expressions, including:
Happy
Sad
Angry
Surprised
Confused
Excited
Scared
These expressions will later be used during facial animation and lip-syncing.
Lesson 5: Character Pose Design
A character's pose communicates personality before any animation begins.
In this lesson, you will learn:
Neutral poses
Action poses
Dynamic poses
Walking poses
Running poses
Hero poses
Relaxed poses
You will also learn about silhouette design and how to create poses that are clear, readable, and full of personality.
Module Practical Project
By the end of this module, you will complete your first full character concept.
Your project will include:
A unique character name
A short character biography
Personality traits
Shape language selection
Body proportions
Clothing design
Color palette
Facial expression sheet
Pose sheet
This project will prepare you for creating the final vector character in Adobe Illustrator during Module 3.
Module Learning Outcomes
After successfully completing this module, you will be able to:
✅ Generate original character ideas from simple concepts.
✅ Create detailed character personalities and backstories.
✅ Use shape language to communicate emotion and personality.
✅ Draw balanced character anatomy and proportions.
✅ Design expressive facial features and multiple emotions.
✅ Create dynamic poses that communicate action and personality.
✅ Develop a complete character concept ready for vector illustration.
Skills You Will Gain
After completing this module, you will have the ability to:
Think like a professional character designer.
Develop creative and original character concepts.
Design characters that are visually appealing and animation-ready.
Apply design principles to create memorable and expressive characters.
Prepare character concepts for vector illustration and animation.
In the next lesson, you will begin the exciting process of creating original character ideas and developing compelling stories, laying the foundation for characters that audiences will remember and enjoy.
-
LESSON 1: CREATING CHARACTER IDEAS AND STORIES
-
Review Questions
-
LESSON 2: CHARACTER SHAPE LANGUAGE
-
Review Questions
-
Lesson 3: Character Anatomy and Proportions
-
Review Questions
-
Lesson 4: Creating Facial Features and Expressions
-
True or False Questions
-
Lesson 5: Character Pose Design
-
Review Questions
MODULE 3: Creating Vector Characters in Adobe Illustrator
-
LESSON 1: SETTING UP ADOBE ILLUSTRATOR FOR CHARACTER DESIGN
-
Review questions
-
Lesson 2: Drawing Character Shapes
-
Review Questions
-
LESSON 3: DESIGNING THE HEAD AND FACIAL FEATURES
-
True or False Questions
-
Lesson 4: Creating the Body and Clothing
-
Review Questions
-
Lesson 5: Preparing Vector Artwork for Animation
-
Review Questions
MODULE 4: RIGGING CHARACTERS IN ADOBE ANIMATE
Module Introduction
Welcome to Module 4: Rigging Characters in Adobe Animate.
Congratulations! You have successfully created a complete vector character in Adobe Illustrator. Your character now has a well-designed head, facial features, body, clothing, and accessories, all organized into separate layers for animation.
The next step is rigging.
Rigging is the process of preparing a character for animation by connecting its body parts so they can move naturally. Think of a rig as the character's digital skeleton. Just as the human skeleton allows your body to move, a character rig allows your vector artwork to walk, run, jump, wave, blink, and perform many other actions.
Adobe Animate provides powerful rigging tools that make it possible to animate characters efficiently. Instead of redrawing every frame, you can create reusable rigs that save time and produce smoother animations.
Throughout this module, you will learn how to import Illustrator artwork into Adobe Animate, organize symbols, create a bone structure using the Asset Warp Tool, position pivot points correctly, test character movements, and fix common rigging problems.
By the end of this module, your character will be fully rigged and ready for professional animation.
Why Rigging Is Important
Rigging offers many advantages:
Saves animation time.
Produces smoother movement.
Allows easy editing.
Makes characters reusable.
Improves animation consistency.
Simplifies complex animations.
Without proper rigging, character animation becomes slow and difficult.
What You Will Learn in This Module
Lesson 1: Importing Illustrator Files into Adobe Animate
In this lesson, you will learn how to:
Create a new Adobe Animate project.
Import Illustrator (.AI) files.
Preserve layers during import.
Organize imported artwork.
Check imported assets for errors.
Lesson 2: Converting Artwork into Symbols
Symbols are the foundation of animation in Adobe Animate.
You will learn how to:
Understand different symbol types.
Convert body parts into symbols.
Name symbols correctly.
Organize symbols in the Library.
Prepare symbols for rigging.
Lesson 3: Rigging with the Asset Warp Tool
This lesson introduces Adobe Animate's rigging system.
Topics include:
Understanding the Asset Warp Tool.
Creating joints.
Connecting body parts.
Building arm and leg rigs.
Rigging the torso.
Testing basic movement.
Lesson 4: Setting Pivot Points and Testing the Rig
Proper pivot placement is essential for natural movement.
You will learn how to:
Position pivot points.
Adjust joint rotations.
Test arm movement.
Test leg movement.
Correct rotation problems.
Improve rig flexibility.
Lesson 5: Fixing Rigging Problems and Preparing for Animation
The final lesson covers:
Identifying rigging errors.
Correcting misplaced joints.
Organizing the timeline.
Cleaning the project.
Saving reusable rigs.
Preparing the character for animation.
Module Practical Project
By the end of this module, you will have:
Imported your Illustrator character.
Converted every body part into symbols.
Rigged the complete character.
Tested all body movements.
Corrected rigging issues.
Prepared the character for animation.
Module Learning Outcomes
After completing this module, you will be able to:
✅ Import Illustrator artwork into Adobe Animate.
✅ Convert artwork into animation-ready symbols.
✅ Build a complete character rig using the Asset Warp Tool.
✅ Set accurate pivot points for natural movement.
✅ Test and refine your character rig.
✅ Prepare a professional rig ready for animation.
Skills You Will Gain
By the end of this module, you will have developed the ability to:
Build professional character rigs.
Organize animation assets efficiently.
Create reusable animation-ready characters.
Solve common rigging issues.
Prepare complex characters for smooth animation.
In the next lesson, you will begin by importing your Adobe Illustrator character into Adobe Animate, preserving its layers and preparing the artwork for the rigging process.
-
LESSON 1: IMPORTING ILLUSTRATOR FILES INTO ADOBE ANIMATE
-
Review Questions
-
LESSON 2: UNDERSTANDING SYMBOLS
-
Review Questions
-
LESSON 3: CREATING CHARACTER HIERARCHY
-
Review Questions
-
LESSON 4: PREPARING FACIAL ANIMATION CONTROLS
-
Review Questions
-
Lesson 5: Testing Character Movement
-
Review Questions
MODULE 5: Character Rigging Techniques in Adobe Animate
-
Lesson 1: Introduction to Character Rigging
-
Review Questions
-
LESSON 2: USING THE BONE TOOL
-
Review Questions
-
Lesson 3: Creating Body Controls
-
Review Questions
-
LESSON 4: ADVANCED RIGGING TECHNIQUES
-
Review Questions
-
Lesson 5: Creating a Complete Character Rig
-
Review Questions
MODULE 6: Basic Character Animation Techniques
Module Introduction
Welcome to Module 6: Basic Character Animation Techniques.
You have now completed the character rigging stage. Your character has a skeleton, body controls, facial controls, and a complete rig that can be manipulated inside Adobe Animate.
Now it is time to make your character move and perform.
Rigging gives you the controls, but animation is what gives the character life. In this module, you will learn how to use the Timeline, keyframes, poses, motion tweening, timing, and animation principles to create believable character movement.
You will begin with simple movements and gradually progress to more complex actions such as walking, running, jumping, sitting, and hand gestures.
Module Learning Objectives
By the end of this module, you will be able to:
Understand the Adobe Animate Timeline.
Work with frames and keyframes.
Control animation timing.
Create basic character movements.
Move, rotate, and scale character parts.
Create important character poses.
Build a basic walk cycle.
Animate actions and gestures.
Apply timing and spacing to improve movement.
Lesson 1: Understanding the Timeline
Topics Covered
Frames
Keyframes
Layers
Frame rate
Timeline navigation
Understanding animation duration
Working with the playhead
You will learn how the Timeline controls the passage of time in your animation and how to create and organize keyframes.
Lesson 2: Creating Basic Movements
Topics Covered
Moving objects
Rotation
Scaling
Position changes
Motion tweening
Creating simple transitions
Controlling movement speed
You will learn how to create basic movements and use tweening to make your character move smoothly between positions.
Lesson 3: Animating Character Poses
Topics Covered
Pose-to-pose animation
Key poses
Breakdown poses
In-between frames
Smooth transitions
Creating strong poses
Using poses to communicate emotion
You will learn how to create meaningful character poses and connect them together to produce believable movement.
Lesson 4: Creating Walk Cycles
Topics Covered
Walk cycle principles
Contact pose
Passing pose
Weight movement
Arm swing
Foot movement
Looping animation
You will build a basic character walk cycle and learn how to make the movement repeat smoothly.
Lesson 5: Animating Character Actions
Topics Covered
Jumping
Running
Sitting
Hand gestures
Body acting
Anticipation
Follow-through
Creating believable actions
You will combine your rigging and animation skills to create different character actions and performances.
Module Project
At the end of Module 6, you will create a Basic Character Animation Reel containing several short movements.
Your project should include:
A simple body movement.
A facial expression change.
A basic walk cycle.
A hand gesture.
A jumping or running action.
A sitting or standing action.
This project will help you practice controlling your rig and applying animation principles.
Skills You Will Develop
During this module, you will develop important animation skills such as:
Timing
Learning how long a movement should take.
Spacing
Understanding how the distance between positions affects movement.
Posing
Creating clear and expressive character positions.
Rhythm
Creating a natural flow between movements.
Weight
Making the character appear light, heavy, fast, or slow.
Acting
Using movement to communicate what the character is thinking or feeling.
Module Workflow
You will progress through the module in this order:
Timeline → Basic Movement → Poses → Walk Cycle → Character Actions
Each lesson builds on the previous one.
By the end of the module, you will have moved beyond simply controlling your rig. You will begin using it to create real character performances.
Module 6 Final Outcome
By completing this module, you should be comfortable taking your rigged character and creating basic animation inside Adobe Animate.
You will understand how to:
Plan → Pose → Animate → Refine → Preview
This workflow will prepare you for Module 7: Advanced Character Animation, where you will move into facial animation, character acting, camera movement, special effects, and complete animated scenes.
-
LESSON 1: UNDERSTANDING THE TIMELINE
-
Review Questions
-
LESSON 2: CREATING BASIC MOVEMENTS
-
Review Questions
-
LESSON 3: ANIMATING CHARACTER POSES
-
Review Questions
-
Lesson 4: Creating Walk Cycles
-
Review Questions
-
Lesson 5: Animating Character Actions
-
Review Questions
MODULE 7: Advanced Character Animation
Module Introduction
Welcome to Module 7: Advanced Character Animation.
You have now learned how to control your rigged character, create basic movements, build poses, create walk cycles, and animate common character actions. In this module, you will take your animation skills to the next level.
Professional character animation is about more than making a character move. A good animator makes the character communicate, act, react, and tell a story through movement.
You will learn how to create facial animation, synchronize mouth movements with dialogue, animate eyes and expressions, develop believable character acting, work with cameras and scenes, add special effects, and combine everything into complete animated scenes.
Module Learning Objectives
By the end of this module, you should be able to:
Create expressive facial animation.
Animate eyes, blinking, and mouth movements.
Synchronize a character's mouth with dialogue.
Use body language to communicate emotions.
Create believable character performances.
Animate camera movements.
Integrate characters with backgrounds and scenes.
Create basic visual effects.
Combine characters, sound, camera movement, and effects.
Produce a complete animated scene.
Lesson 1: Facial Animation
Topics Covered
Lip syncing
Eye movement
Blinking
Emotional expressions
Talking characters
Mouth-shape libraries
Facial timing
You will learn how to make your character's face communicate emotions and synchronize with speech.
Lesson 2: Character Acting
Topics Covered
Storytelling through movement
Body language
Acting poses
Personality animation
Creating believable performances
Reactions
Emotional timing
You will learn how to make your character behave like a believable person rather than simply moving from one position to another.
Lesson 3: Camera and Scene Animation
Topics Covered
Camera movement
Scene composition
Background integration
Zoom effects
Panning
Cinematic animation
Creating visual focus
You will learn how to use camera movement and scene composition to make your animation more engaging and cinematic.
Lesson 4: Special Effects Animation
Topics Covered
Smoke
Fire
Motion effects
Lighting effects
Impact effects
Visual enhancements
Layering effects
You will learn how to add visual effects that support your character animation and make scenes more dynamic.
Lesson 5: Creating Complete Animated Scenes
Topics Covered
Combining characters
Adding sound
Timing scenes
Editing animation
Camera integration
Backgrounds
Effects
Final presentation
You will combine your character animation, facial expressions, acting, camera movement, sound, and effects to create a complete animated scene.
Module 7 Project
At the end of this module, you will create a Complete Character Performance Scene.
Your project should include:
A rigged character.
Facial expressions.
Eye movement.
Lip syncing.
Body acting.
Character interaction.
Background elements.
Camera movement.
At least one visual effect.
Sound or dialogue.
A beginning, middle, and ending.
A possible scene structure could be:
Scene Begins
↓
Character Enters
↓
Character Looks Around
↓
Character Speaks
↓
Facial Expression Changes
↓
Character Performs an Action
↓
Camera Movement
↓
Reaction
↓
Scene Ends
Advanced Animation Workflow
Throughout this module, you will follow a professional workflow:
Plan → Pose → Animate → Add Expression → Add Camera → Add Effects → Add Sound → Refine → Preview
This workflow will help you avoid creating animation randomly.
Skills You Will Develop
Facial Performance
You will learn to use the eyes, mouth, eyebrows, and facial expressions to communicate emotions.
Character Acting
You will learn how body language and movement can communicate thoughts and feelings.
Cinematic Composition
You will learn how camera movement and framing can direct the viewer's attention.
Visual Effects
You will learn how effects can enhance movement and storytelling.
Scene Production
You will learn how to combine multiple animation elements into one finished scene.
Module 7 Final Outcome
By completing this module, you should be able to create a character that does more than simply move.
Your character should be able to:
Speak → React → Express Emotion → Perform Actions → Interact With the Scene → Tell a Story
These skills will prepare you for Module 8: Professional Animation Workflow and Production, where you will learn how to plan projects, refine animation, work with audio, export your work, and build a professional animation portfolio.
-
LESSON 1: FACIAL ANIMATION
-
Review Questions
-
Lesson 2: Character Acting
-
Review Questions
-
Lesson 3: Camera and Scene Animation
-
Review Questions
-
Lesson 4: Special Effects Animation
-
Review Questions
-
Lesson 5: Creating Complete Animated Scenes
-
True or False Questions
MODULE 8: Professional Animation Workflow and Production
Module Introduction
Welcome to Module 8: Professional Animation Workflow and Production.
You have now learned how to create 2D vector characters, prepare them for rigging, build character rigs, create basic and advanced animation, animate facial expressions, create character performances, use cameras, and add special effects.
Now it is time to learn how professional animators organize and complete animation projects.
In a professional production environment, creating good animation is only part of the job. You must also know how to plan projects, organize assets, manage timelines, work with audio, refine animation, export your work, and present your skills professionally.
This module will help you develop a structured workflow that can be used for personal projects, freelance work, studio production, educational content, social media animation, advertisements, and other professional projects.
Module Learning Objectives
By the end of this module, you should be able to:
Plan an animation project from beginning to end.
Create simple storyboards.
Work with scripts and production schedules.
Organize character and project assets.
Improve the quality of animation.
Refine timing and movement.
Import and synchronize audio.
Add sound effects and music.
Export animations in appropriate formats.
Create a professional animation portfolio.
Prepare a demo reel.
Present animation work to potential clients or employers.
Module 8 Lessons
Lesson 1: Planning Animation Projects
Topics Covered:
Understanding animation project planning
Storyboards
Scripts
Production schedules
Shot planning
Asset management
Organizing project files
Creating an animation workflow
Students will learn how to plan an animation before beginning production.
Lesson 2: Improving Animation Quality
Topics Covered:
Smooth movements
Fixing animation errors
Refining timing
Improving poses
Adding secondary movement
Improving facial animation
Removing unnecessary movement
Final animation polishing
Students will learn how to review an animation and improve it from a rough version into a more polished production.
Lesson 3: Working With Audio
Topics Covered:
Importing sound
Understanding audio on the Timeline
Voice synchronization
Lip syncing
Sound effects
Music integration
Audio timing
Balancing dialogue and music
Students will learn how to use audio to strengthen character animation and storytelling.
Lesson 4: Exporting Animations
Topics Covered:
Understanding export formats
Video export
GIF export
Web animation
Rendering settings
Resolution
Frame rate
File size
Preparing animations for different platforms
Students will learn how to prepare their completed animations for delivery, publishing, websites, social media, and other platforms.
Lesson 5: Building an Animation Portfolio
Topics Covered:
Selecting animation projects
Creating a demo reel
Presenting animation work
Creating an online portfolio
Showing character animation skills
Finding freelance opportunities
Applying for animation jobs
Building a professional identity
Students will learn how to present their animation skills professionally and begin looking for opportunities.
Module 8 Practical Project
At the end of this module, students will create a Professional Animation Production Package.
The project should contain:
1. Project Plan
A simple document explaining:
Project title.
Story idea.
Characters.
Environment.
Target duration.
Required assets.
2. Storyboard
Create a basic storyboard showing the major shots.
3. Animated Scene
Create and refine a short animated scene.
4. Audio
Add:
Dialogue.
Sound effects.
Music where appropriate.
5. Final Export
Export the animation in an appropriate format.
6. Portfolio Presentation
Prepare the project so it can be displayed as part of an animation portfolio.
Professional Animation Workflow
Throughout Module 8, students will follow this workflow:
IDEA
↓
SCRIPT
↓
STORYBOARD
↓
ASSET PREPARATION
↓
ANIMATION PLAN
↓
ROUGH ANIMATION
↓
CHARACTER ANIMATION
↓
FACIAL ANIMATION
↓
CAMERA
↓
AUDIO
↓
SPECIAL EFFECTS
↓
REFINEMENT
↓
FINAL REVIEW
↓
EXPORT
↓
PORTFOLIO
This workflow helps prevent confusion and unnecessary rework.
Important Professional Skills
Organization
Keep your files, characters, symbols, audio, backgrounds, and scenes properly organized.
Planning
Know what you are going to create before spending time animating.
Consistency
Make sure characters and visual elements remain consistent throughout the project.
Quality Control
Review your animation carefully before delivering it.
Presentation
Even excellent animation needs to be presented professionally.
Module 8 Review Questions
1. Why are storyboards important in animation production?
2. What is a demo reel?
3. Why should an animation be refined before final export?
4. Why is audio synchronization important?
5. Name two animation export formats.
Module 8 Review Answers
1.
Storyboards are important because they help plan the shots, actions, camera angles, and sequence of events before animation begins.
2.
A demo reel is a short collection of an animator's best work used to demonstrate their skills to clients, employers, studios, or other professional opportunities.
3.
Animation should be refined before final export to correct mistakes, improve timing, smooth movements, strengthen acting, and produce a more professional result.
4.
Audio synchronization is important because dialogue, sound effects, music, and character movements need to occur at the correct times for the scene to feel believable and coordinated.
5.
Two animation export formats include MP4 video and GIF.
-
Lesson 1: Planning Animation Projects
-
Review Questions
-
LESSON 2: IMPROVING ANIMATION QUALITY
-
Multiple-Choice Review Questions
-
Lesson 3: Working With Audio
-
Review Questions
-
Lesson 4: Exporting Animations
-
Review Questions
-
Lesson 5: Building an Animation Portfolio
-
Review Questions
MODULE 9: FINAL CHARACTER ANIMATION PROJECT
Module Introduction
Welcome to the final module of the course.
Throughout the previous modules, you have learned how to create 2D vector characters, prepare artwork for animation, create symbols, build character hierarchies, prepare facial controls, create character rigs, animate body movements, create facial performances, work with cameras and effects, use audio, refine animation, export projects, and build a portfolio in Adobe Animate.
Now it is time to bring all these skills together.
In this module, you will complete a final character animation project from beginning to end.
The goal is not simply to create a moving character. You will follow a professional workflow that begins with character development and ends with a finished animation that can be presented in your portfolio.
Module Learning Objectives
By the end of this module, you should be able to:
Develop a complete animated character concept.
Prepare vector character artwork for animation.
Build a complete character rig.
Create reusable character controls.
Test and correct a character rig.
Animate body movement.
Create facial expressions.
Synchronize character animation with audio.
Create a complete animated scene.
Review and refine animation.
Export a finished animation.
Present the completed project professionally.
MODULE 9 LESSONS
Lesson 1: Developing the Final Character
Topics Covered:
Character concept
Design planning
Creating character assets
Vector artwork preparation
Character proportions
Separating body parts
Preparing facial elements
Organizing character files
Preparing artwork for rigging
Students will create or finalize a character that will be used throughout the final project.
Lesson 2: Creating the Final Rig
Topics Covered:
Building the character skeleton
Connecting body parts
Creating character controls
Creating parent and child relationships
Facial controls
Testing movement
Correcting rigging problems
Improving flexibility
Saving the completed rig
Students will build and test a complete character rig ready for animation.
Lesson 3: Animating the Final Scene
Topics Covered:
Planning the scene
Character acting
Body movement
Facial animation
Lip syncing
Character interaction
Background design
Camera movement
Scene timing
Adding secondary movement
Students will animate the final character and create a complete scene.
Lesson 4: Editing and Publishing
Topics Covered:
Reviewing the animation
Fixing mistakes
Refining timing
Improving movement
Checking audio
Adding final effects
Rendering the final animation
Exporting the final video
Preparing the animation for online publishing
Students will complete the final production and prepare the animation for presentation.
Lesson 5: Building a Career With Character Animation
Topics Covered:
Freelancing
Working with animation studios
Online marketplaces
Creating animation content
Building a portfolio
Creating demo reels
Finding clients
Presenting animation services
Developing professional skills
Continuous learning
Students will learn how to turn their animation skills into professional opportunities.
FINAL COURSE PROJECT
The final project should combine the major skills learned throughout the course.
Students should create a short 2D character animation, preferably between 30 seconds and 2 minutes.
The project should contain:
Character
A complete vector character created and prepared for animation.
Rig
A functional character rig with appropriate controls.
Animation
At least one complete character performance.
Facial Animation
Include:
Eye movement.
Blinking.
Facial expressions.
Mouth movement.
Lip syncing where dialogue is used.
Scene
Include:
Background.
Character.
Props where necessary.
Camera composition.
Audio
Include appropriate:
Dialogue.
Sound effects.
Music or ambient sound.
Final Output
Export the completed animation as a suitable video format.
FINAL PROJECT WORKFLOW
Students should follow this workflow:
CHARACTER IDEA
↓
CHARACTER DESIGN
↓
VECTOR ARTWORK
↓
ARTWORK SEPARATION
↓
SYMBOL CREATION
↓
CHARACTER HIERARCHY
↓
RIGGING
↓
RIG TESTING
↓
SCENE PLANNING
↓
BODY ANIMATION
↓
FACIAL ANIMATION
↓
LIP SYNC
↓
CAMERA
↓
AUDIO
↓
SPECIAL EFFECTS
↓
REFINEMENT
↓
FINAL REVIEW
↓
EXPORT
↓
PORTFOLIO
Final Project Assessment Checklist
Before submitting the final project, check the following.
Character Design
☐ Character is visually consistent.
☐ Body proportions are correct.
☐ Character parts are properly separated.
☐ Facial elements are prepared.
Rigging
☐ Body parts move correctly.
☐ Parent-child relationships work properly.
☐ Arms and legs move correctly.
☐ Head movement works.
☐ Facial controls work.
Animation
☐ Character movement is smooth.
☐ Poses are clear.
☐ Timing is appropriate.
☐ Character shows believable acting.
☐ Secondary movement has been added where appropriate.
Audio
☐ Dialogue is clear.
☐ Lip syncing is synchronized.
☐ Sound effects match actions.
☐ Music does not overpower dialogue.
Scene
☐ Background is appropriate.
☐ Camera framing is correct.
☐ Character interacts properly with the environment.
Final Output
☐ Animation has been reviewed.
☐ Mistakes have been corrected.
☐ Final video has been exported.
☐ Exported file plays correctly.
☐ Project is ready for portfolio presentation.
Career Development
Completing this final project gives students something important: evidence of practical ability.
Instead of simply saying:
"I know how to rig and animate characters."
You can show an actual completed project demonstrating your skills.
Your final project can become part of your:
Animation portfolio.
Demo reel.
Freelance presentation.
Job application.
Personal website.
Social media content.
Module 9 Review Questions
1. What are the main stages of creating an animated character?
2. Why is rig testing important?
3. What makes a professional animation project?
4. How can animators build their careers?
5. Why is continuous learning important in animation?
Answers
1. What are the main stages of creating an animated character?
The main stages include character design, vector artwork preparation, separating character parts, creating symbols, rigging, testing the rig, animating the character, adding facial animation, adding audio and effects, refining the animation, and exporting the final project.
2. Why is rig testing important?
Rig testing is important because it helps identify problems with character movement, connections, hierarchy, controls, and separated body parts before animation begins.
3. What makes a professional animation project?
A professional animation project has good character design, properly functioning rigging, clear poses, smooth movement, appropriate timing, facial animation, suitable audio, good scene composition, proper editing, and a high-quality final export.
4. How can animators build their careers?
Animators can build their careers by creating strong portfolios, producing demo reels, working with freelance clients, applying to animation studios, creating their own content, promoting their skills online, and continuously developing their abilities.
5. Why is continuous learning important in animation?
Continuous learning is important because animation software, techniques, production methods, and industry expectations continue to develop. Learning new skills helps animators improve their work and remain competitive.
-
Lesson 1: Developing the Final Character
-
Review Questions
-
Lesson 2: Creating the Final Rig
-
Review Questions
-
Lesson 3: Animating the Final Scene
-
Review Questions
-
Lesson 4: Editing and Publishing
-
Review Questions
-
Lesson 5: Building a Career With Character Animation
-
MODULE 9 FINAL REVIEW QUESTIONS
Student Ratings & Reviews

No Review Yet